> ## Documentation Index
> Fetch the complete documentation index at: https://docs.webagent.ai/llms.txt
> Use this file to discover all available pages before exploring further.

# Zapier Integration

> Here are the step-by-step instructions on how to integrate your WebAgent.ai chatbot with Zapier using Webhooks.

<Note>This is a temporary solution until the Zapier integration is fully complete.</Note>

<Steps titleSize="h2">
  <Step title="Create a New Zap in Zapier">
    <ol>
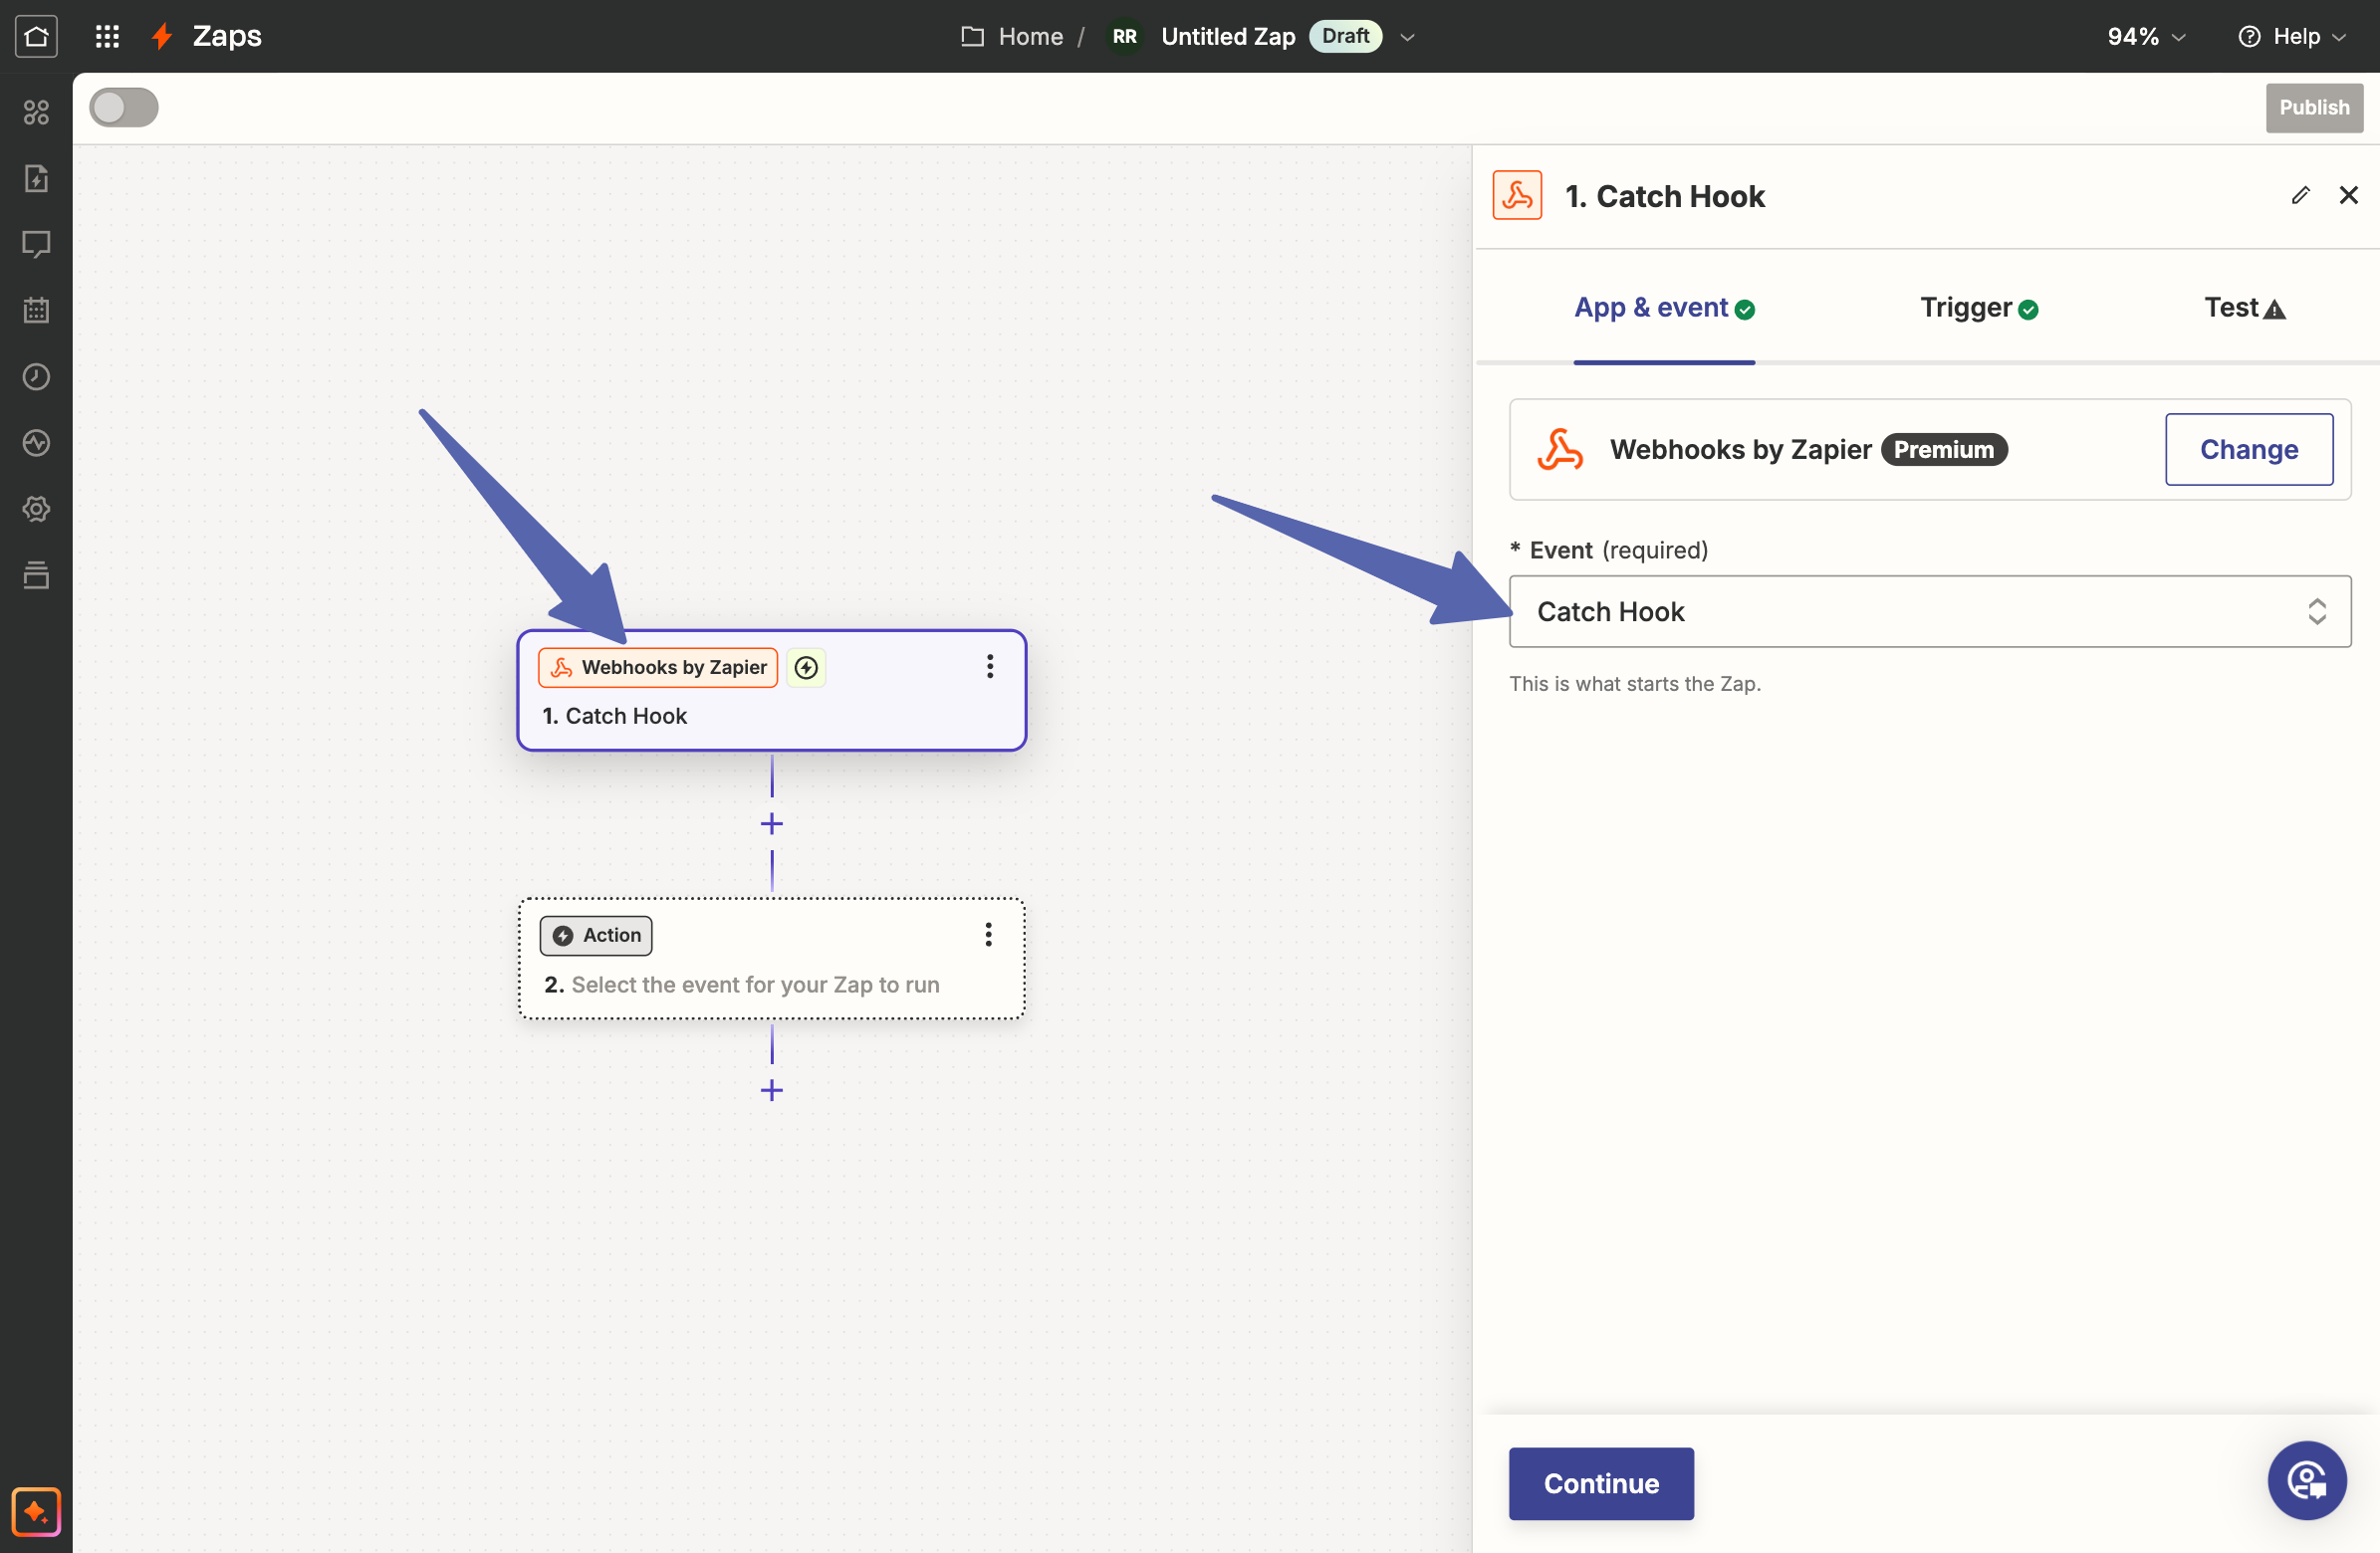
      <li>Log in to your Zapier account and create a new **Zap**.</li>
      <li>Set the trigger to **Webhooks by Zapier**.</li>
      <li>In the **App & event** section, set the **Event** to **Catch Hook**.</li>
      <li>Click **Continue**.</li>
    </ol>

    <img style={{ borderRadius: "0.5rem" }} src="https://mintcdn.com/webagentai/Xo4IpnEW6BaFm2mJ/images/zapier-create-zap.png?fit=max&auto=format&n=Xo4IpnEW6BaFm2mJ&q=85&s=b8b707829e9e28e3438d472063493176" width="2390" height="1560" data-path="images/zapier-create-zap.png" />
  </Step>

  <Step title="Copy the Webhook URL from Zapier">
    <ol>
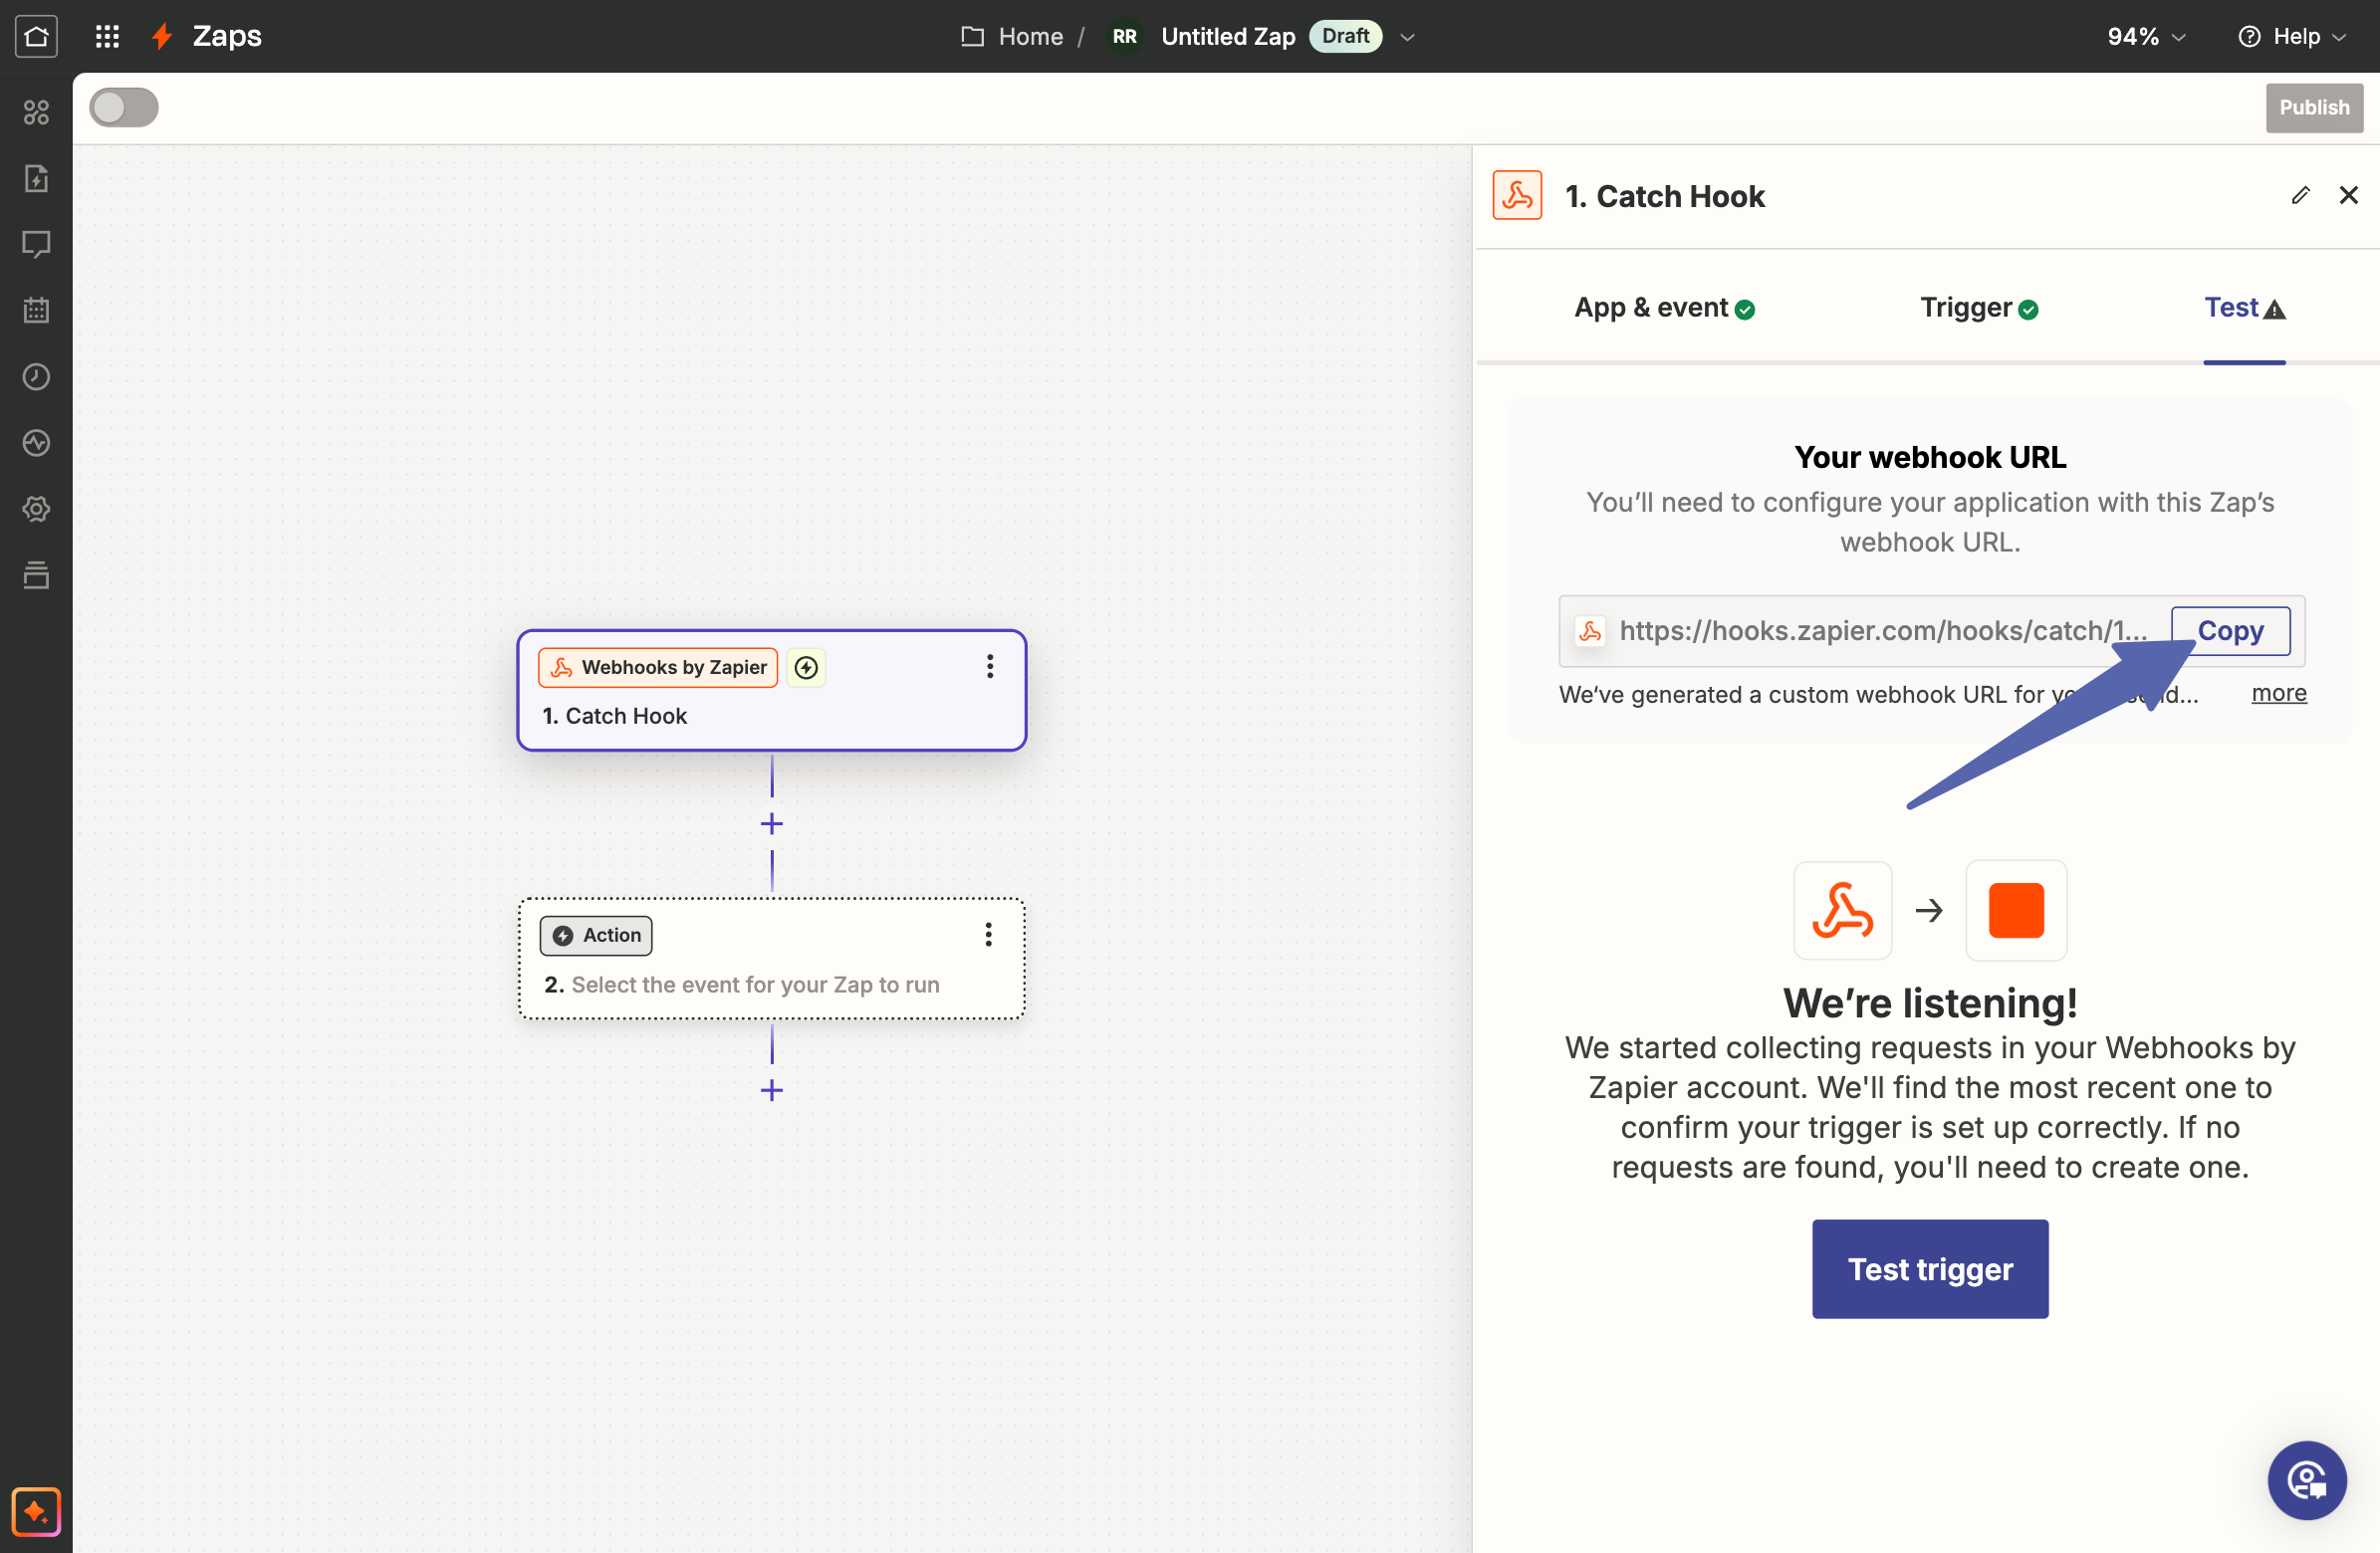
      <li>In the **Test** section, click on **Copy** to copy the webhook URL provided by Zapier.</li>
    </ol>

    <img style={{ borderRadius: "0.5rem" }} src="https://mintcdn.com/webagentai/Xo4IpnEW6BaFm2mJ/images/zapier-copy-webhook.png?fit=max&auto=format&n=Xo4IpnEW6BaFm2mJ&q=85&s=b3bab10243250c0f81f574aaf20fc3ab" width="2390" height="1560" data-path="images/zapier-copy-webhook.png" />
  </Step>

  <Step title="Create a Webhook in WebAgent.ai">
    <ol>
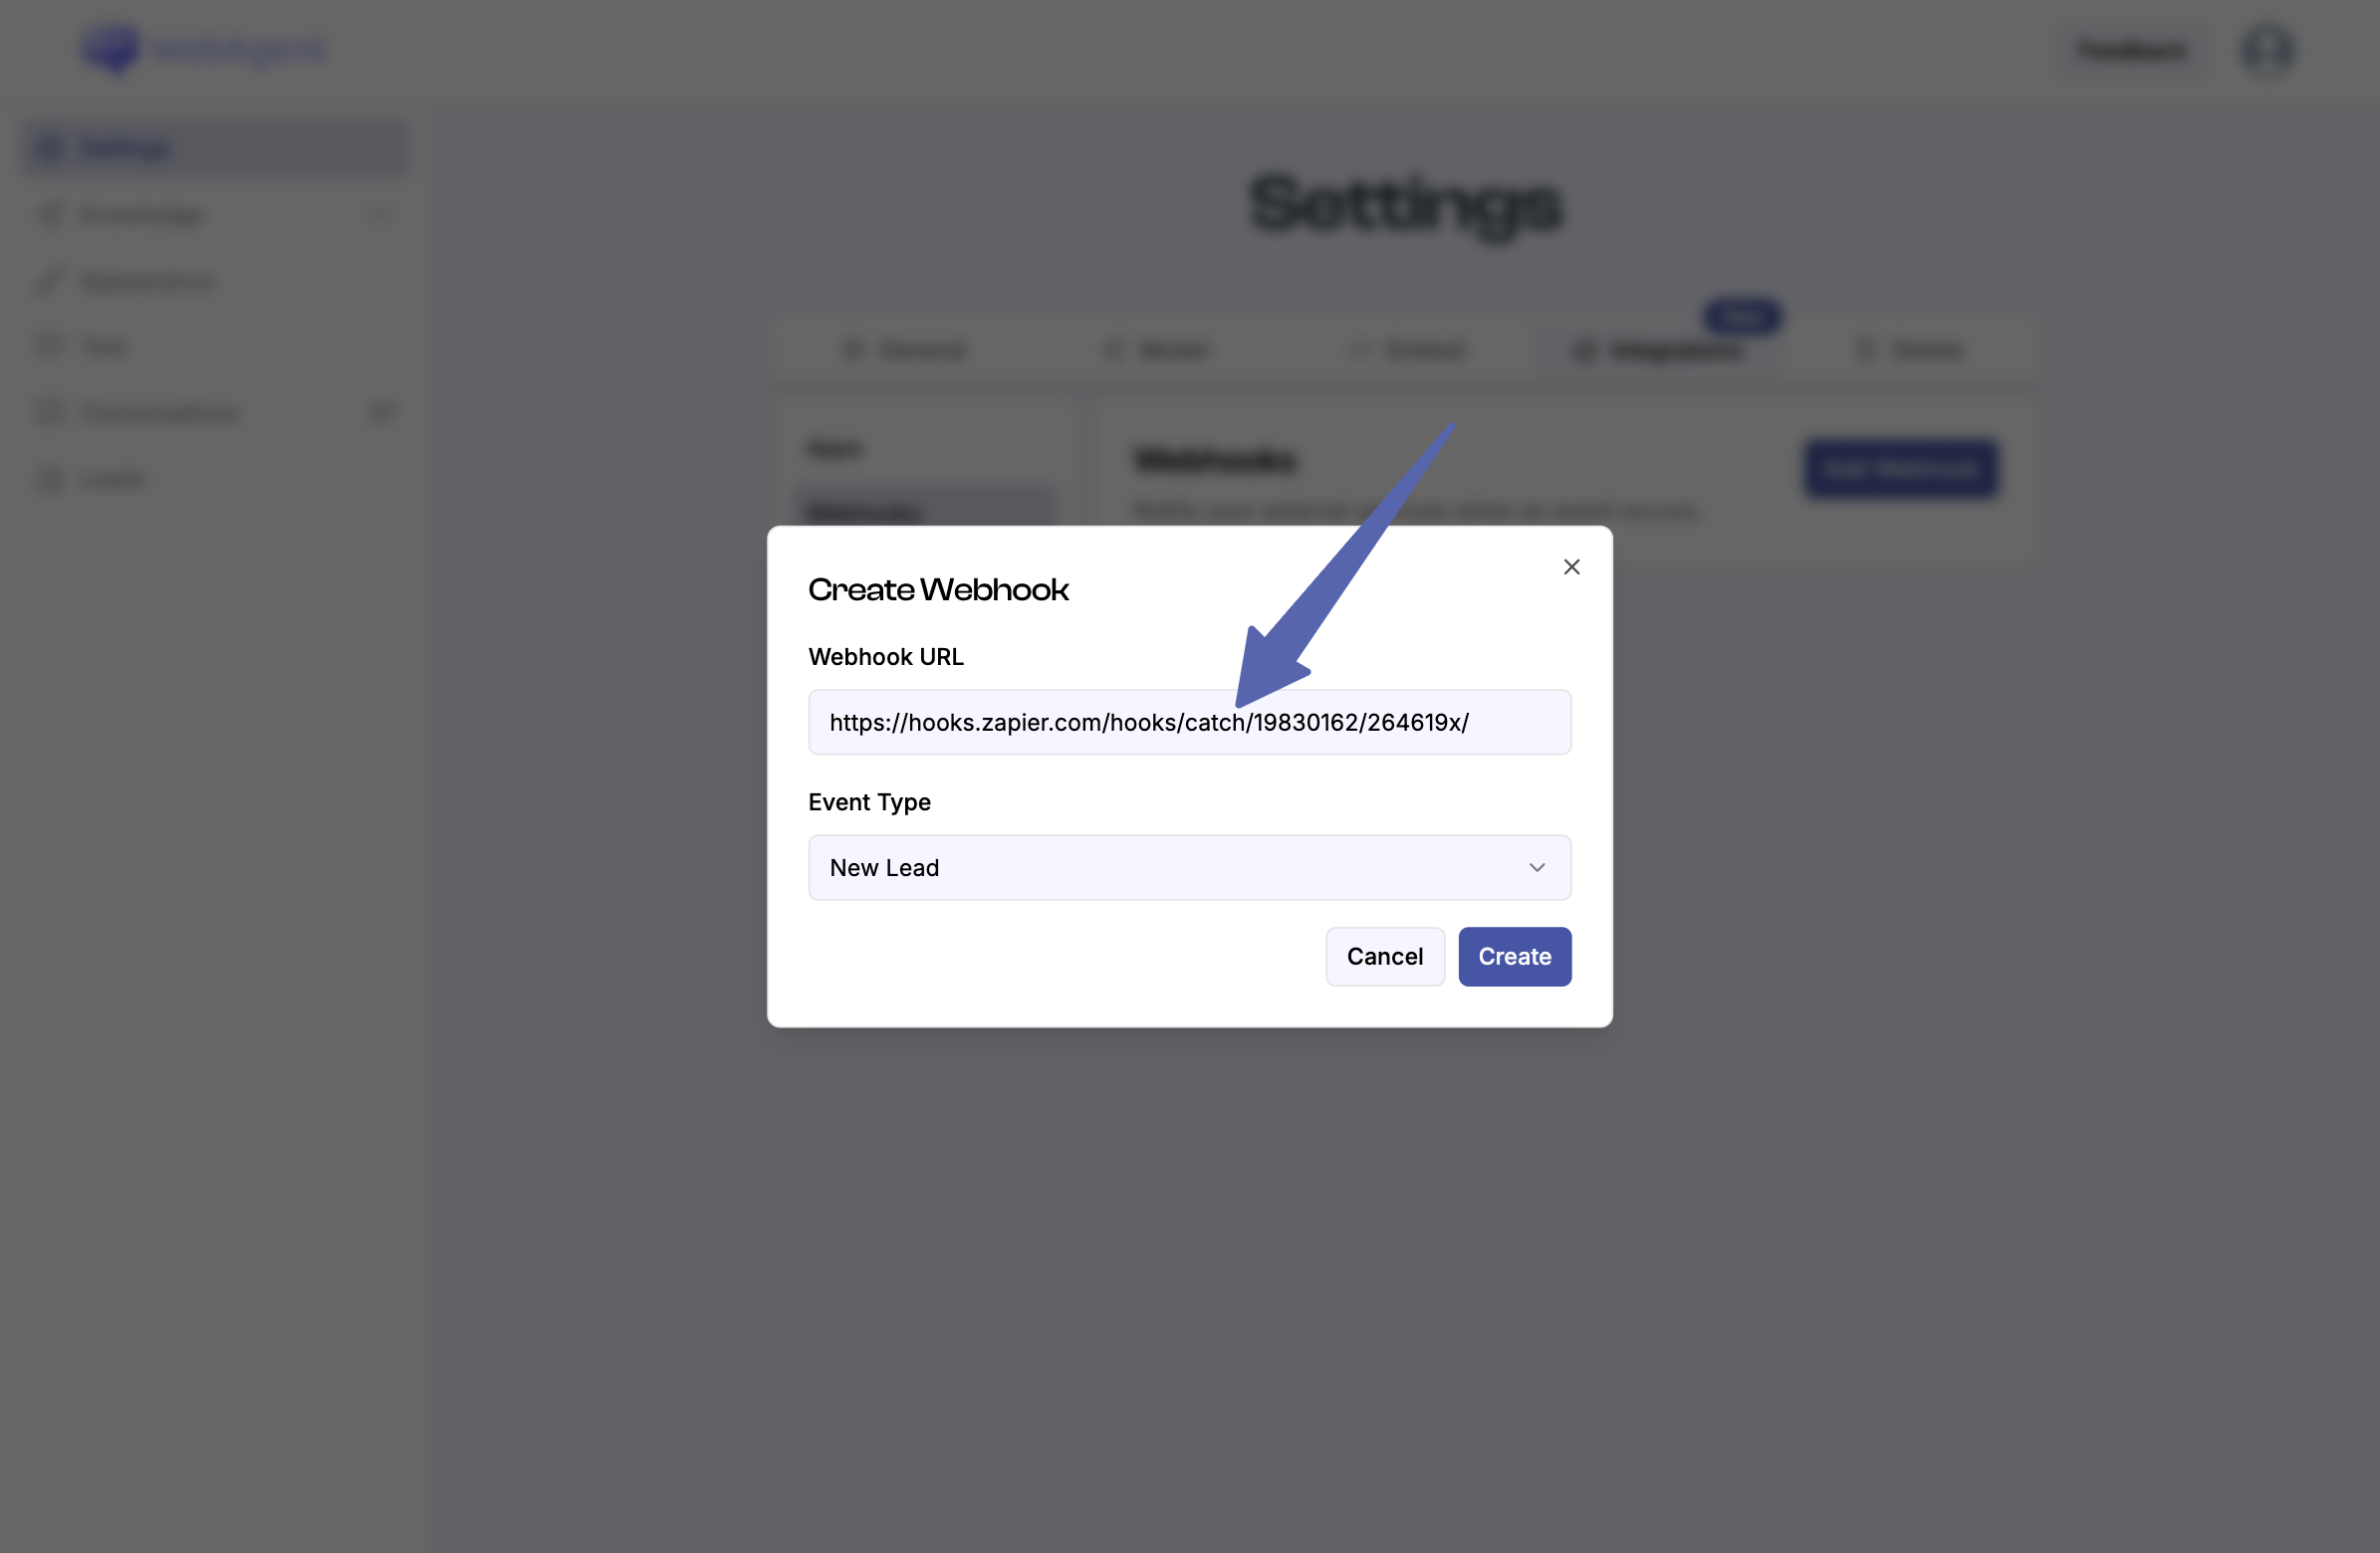
      <li>Log in to your WebAgent.ai account, select your chatbot, then go to **Settings**.</li>
      <li>Navigate to the **Integrations** tab and click on **Webhooks**.</li>
      <li>Click on **Add Webhook** to create a new webhook.</li>
      <li>Paste the webhook URL you copied from Zapier into the **Webhook URL** field.</li>
      <li>Set the **Event** to **New Lead**.</li>
      <li>Click on **Create** to create the webhook.</li>
    </ol>

    <img style={{ borderRadius: "0.5rem" }} src="https://mintcdn.com/webagentai/Xo4IpnEW6BaFm2mJ/images/webagent-add-webhook.png?fit=max&auto=format&n=Xo4IpnEW6BaFm2mJ&q=85&s=40ed654bb5fc41a3ad99a6357dadb845" width="2390" height="1560" data-path="images/webagent-add-webhook.png" />
  </Step>

  <Step title="Run a Test to Capture Webhook Data">
    <ol>
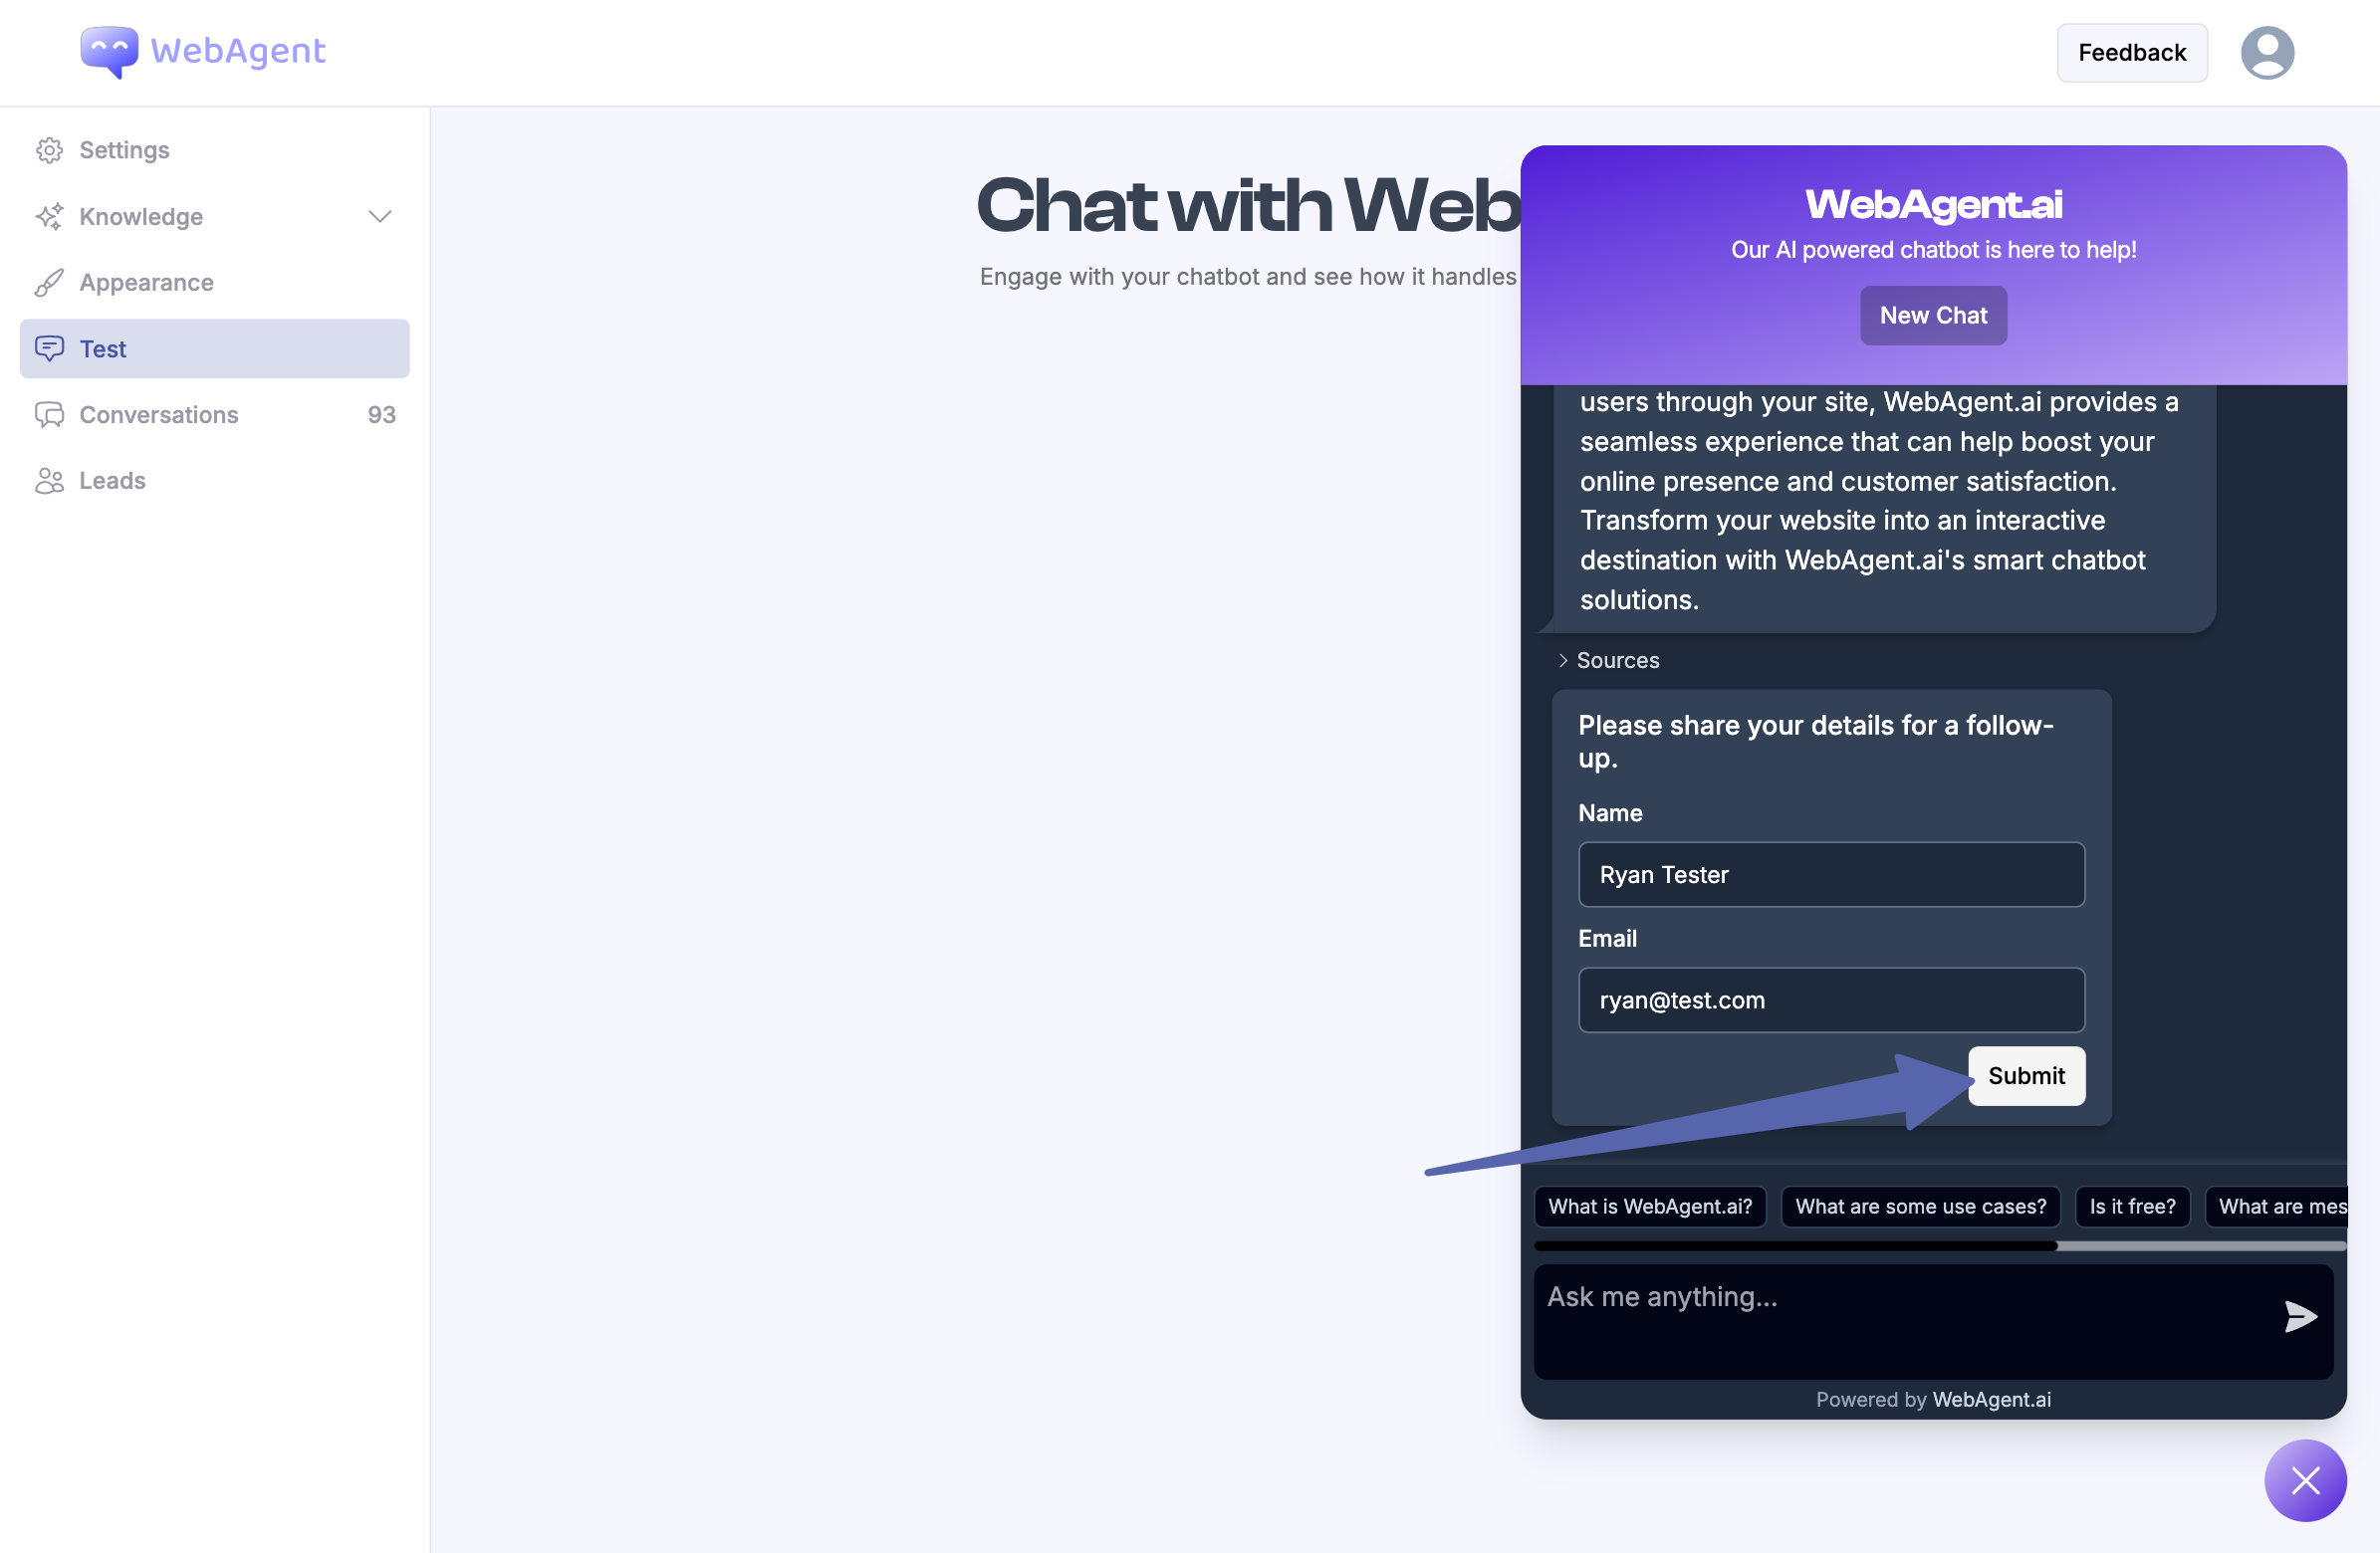
      <li>In your WebAgent.ai account, navigate to the chatbot's **Test** page.</li>
      <li>Start a conversation with your chatbot and fill out the contact form to simulate a new lead. Ensure the **Capture Leads** toggle is enabled under the **General** tab in your chatbot's settings.</li>
    </ol>

    <img style={{ borderRadius: "0.5rem" }} src="https://mintcdn.com/webagentai/Xo4IpnEW6BaFm2mJ/images/webagent-test-conversation.png?fit=max&auto=format&n=Xo4IpnEW6BaFm2mJ&q=85&s=2538db76794154980894c7ce173c6a76" width="2390" height="1560" data-path="images/webagent-test-conversation.png" />
  </Step>

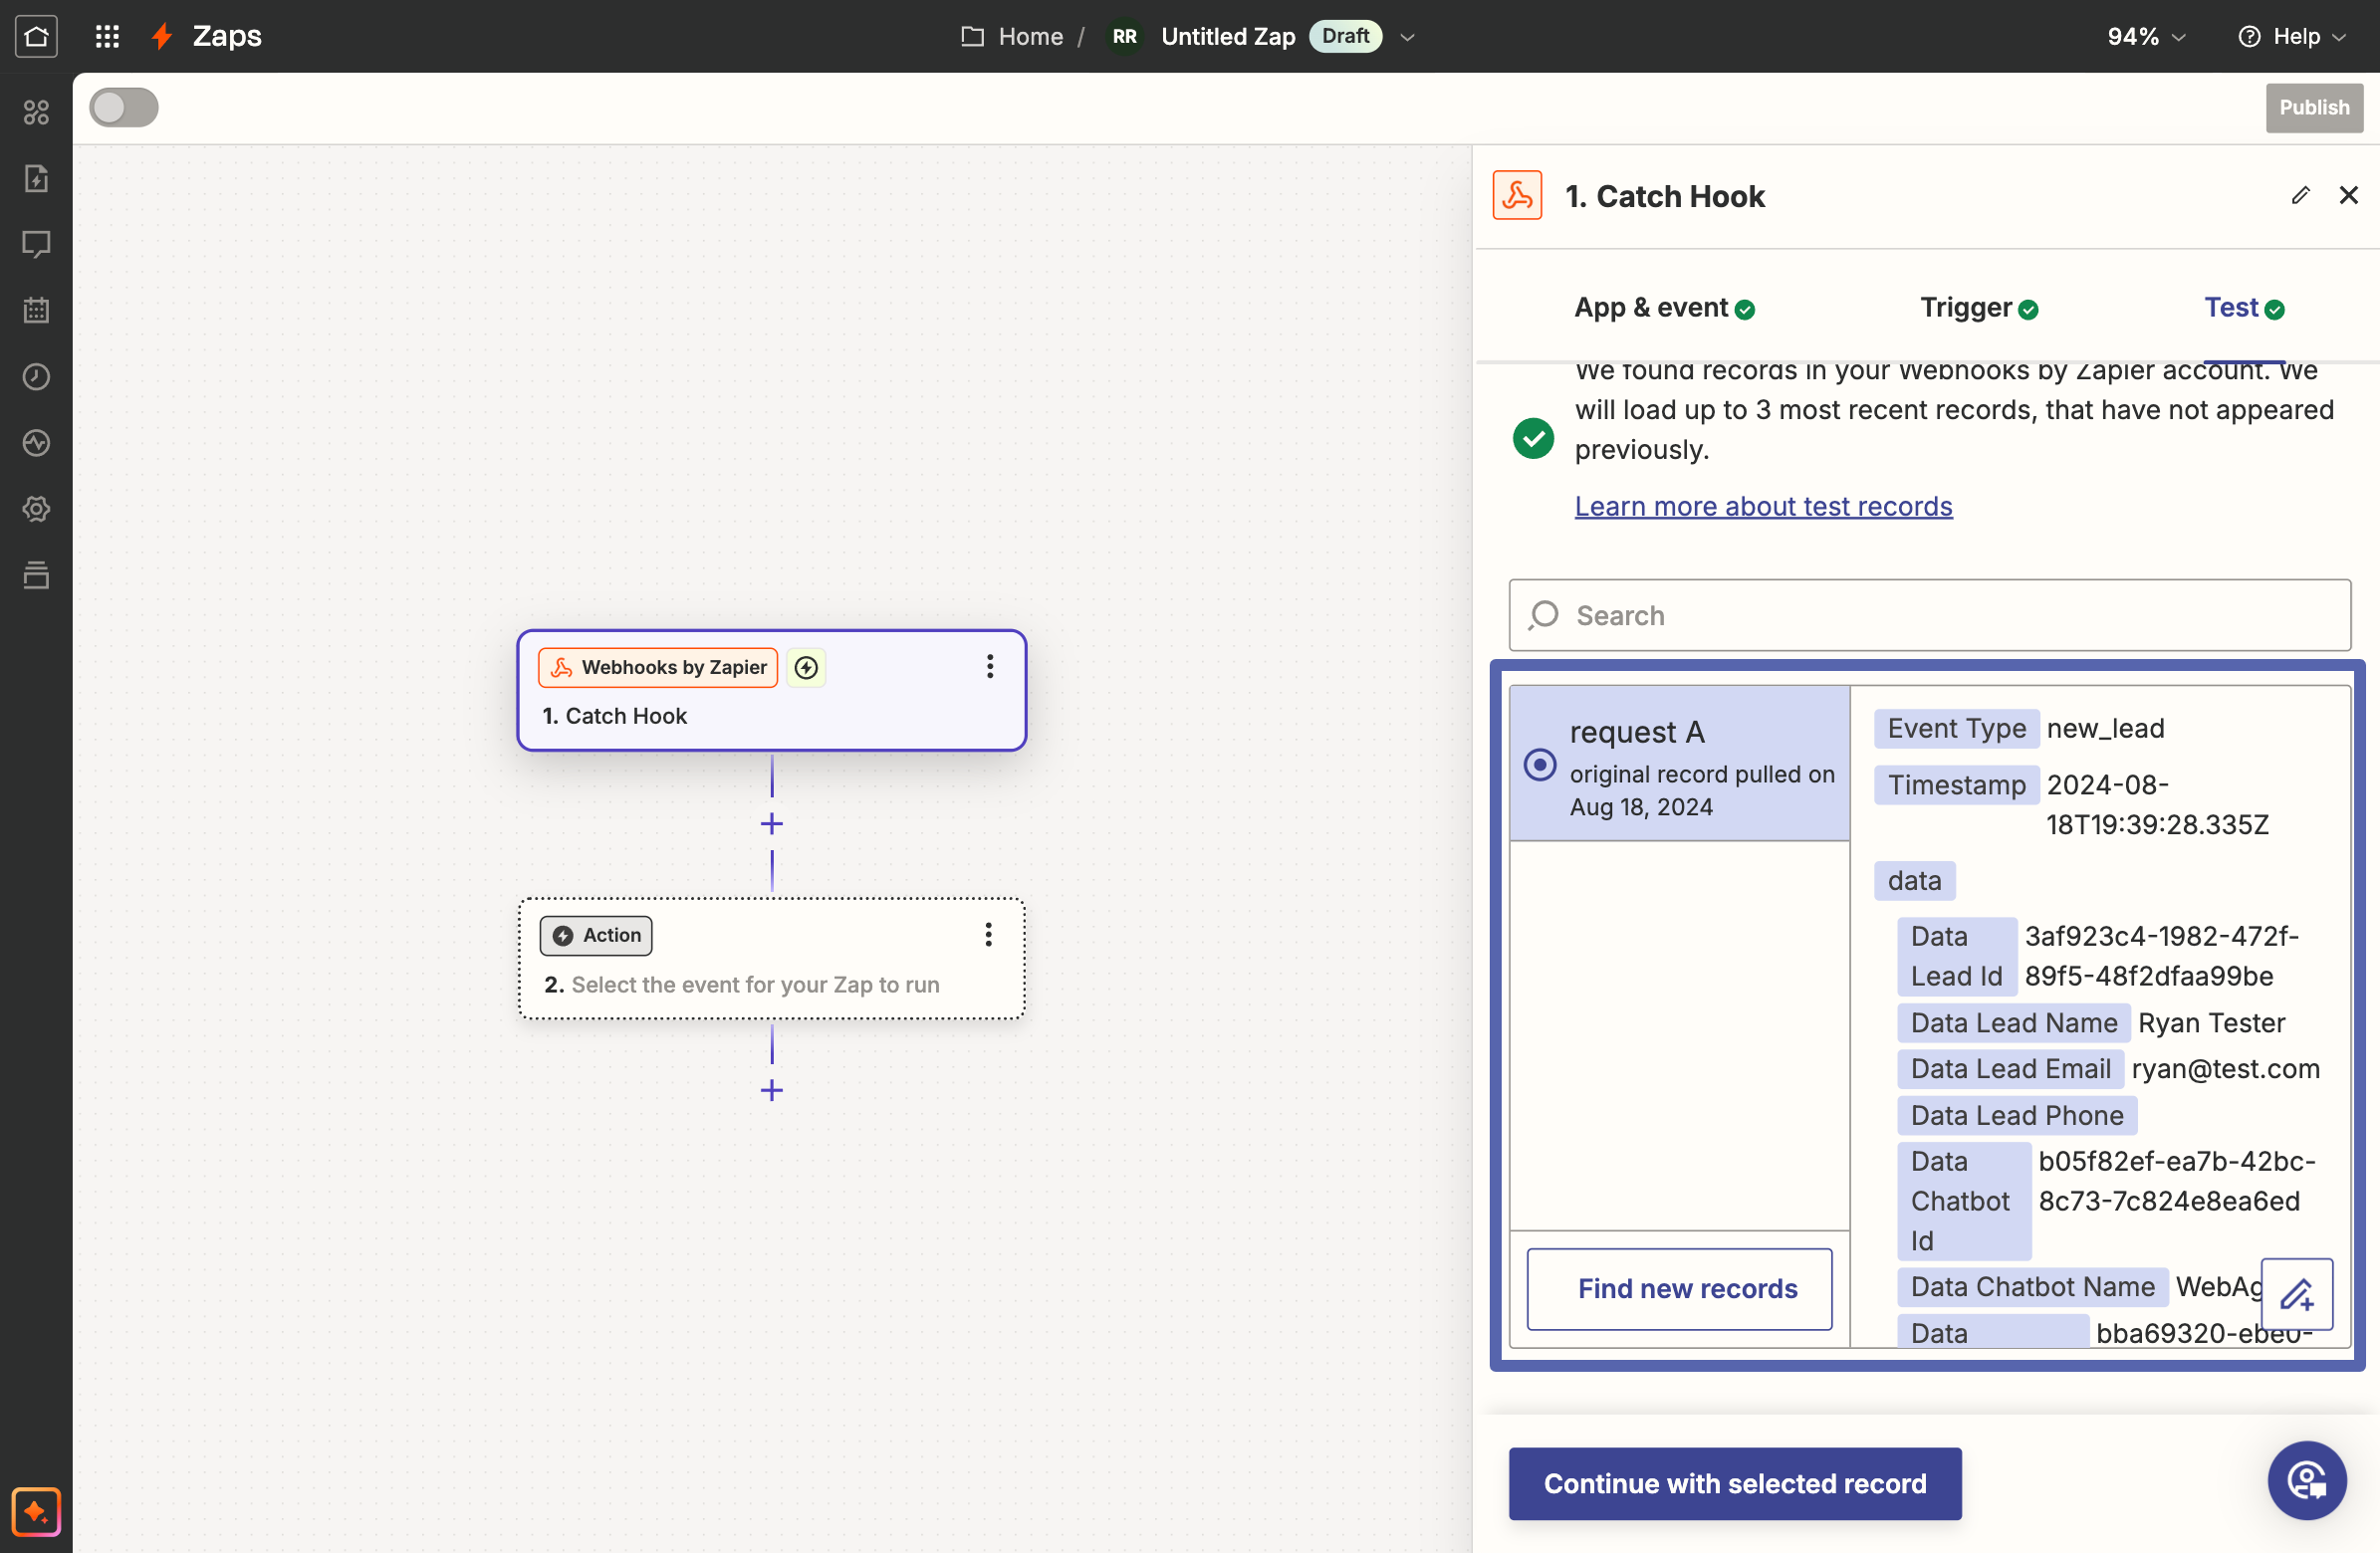
  <Step title="Test the Trigger in Zapier">
    <ol>
      <li>Go back to Zapier and click on **Test Trigger** in the **Test** section.</li>
      <li>You should see the data from the test conversation appear.</li>
      <li>Once you see the data, click **Continue with selected record** to finish setting up your Zapier action.</li>
    </ol>

    <img style={{ borderRadius: "0.5rem" }} src="https://mintcdn.com/webagentai/Xo4IpnEW6BaFm2mJ/images/zapier-test-trigger.png?fit=max&auto=format&n=Xo4IpnEW6BaFm2mJ&q=85&s=2725a514b0c9f23301e86cceae942237" width="2390" height="1560" data-path="images/zapier-test-trigger.png" />
  </Step>
</Steps>